Posts

Showing posts from July, 2016

Desk Decor-Part 4

Image
Hey guys! Today's Monday, and it is also the last part in my series, Desk Decor! I am kind of sad that it is ending but also a bit happy that we can move on to a new craft! If you guys would like to see more series please let me know in the comments below! So lets get started on a DIY Book Case!! Step 1:  Gather your supplies: A wooden box(with the top and a side taken off),a pen, paper, scissors, glue, and a ruler. Step 2:  Measure with your ruler and cut the length of the sides of the box. Cut the paper so that it is the perfect length. Step 3: Take your paper and a pen, and write your favorite quote. Mine is: "When Something goes wrong in your life just yell, Plot Twist! And move on." Step 4:  Now go ahead and glue your quote onto your box. Let it dry completely.  Step 5: And your done! Now you have your very own book case!  And there you have it! I hope you all enjoyed this series! It was really exciting to do!

Desk Decor-Part 3

Image
Hey guys! Today is Monday and part 3 of my Desk Decor series. So today I thought I would show you how to make a decor above your desk. But it still is in the desk decor category. I had so much fun making this craft and it turned out super well. So lets get started! Step 1:  Gather your supplies: A piece of paper (so that your work space doesn't get dirty),a paint brush, paint, a ribbon, clothes pins, tape or tacks, and printed out photos.(they can be ones your took yourself, or got off of the internet) Step 2: Start off by painting your clothes pins. You might have to give your clothes pins more then one coat if your paint is very liquidity. Step 3:  Once you have finished painting your clothes pins, let then dry completely before moving on to the next step. Step 4: Take your photos and your clothes pins.  And Attach your ribbon to the wall with tape or tacks.  Step 5: Now go ahead and clip your pictures to your ribbon. And

Desk Decor-Part 2

Image
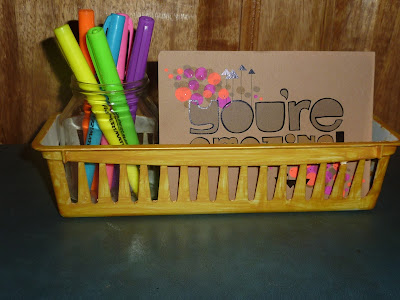
Hey guys! Its Monday and today is part 2 of my Desk Decor Series! I hope you are enjoying this series so far! But today I want to show you how you can decorate a organizer for your desk. You probably have noticed by now but the color for my desk decor is gold. Anyways lets get started! Step 1: Gather your supplies: A plastic pencil organizer, scrap paper, paint, and a paintbrush. Step 2:  Take some of your scrap paper and put it inside and underneath your organizer.  Step 3:  Now take your paint and give your organizer a quick coat. Let it dry for a bit and go back and give it another coat of paint. Step 4: Once your organizer has dried completely take off the paper. And your done! I put a jar of markers and a card into my newly decorated organizer. And that is how you make it! :) Like,share and comment! Come back next week for part 3 of Desk Decor! Have a great day and I'll see you on Monday! -BloggerGirl

Desk Decor-Part 1

Image
Hey guys! Its Monday! And today is really exciting because it is the start of my desk decor series! I don't know how long this series will go for but I'm super excited! :) So to start of part 1 of The Desk Decor series, I am going to show you how to make this really cool kind of name placement! :) It is so cool! I personalized mine to say Blogger. But you can write whatever you want for example, writer,artist,biker,ect  So I hope you enjoy! Let's get started! Step 1:  Gather your supplies: 1 piece of cardboard, paper, paint,double sided tape, a stapler, scissors,and a paintbrush. Step 2:  Take your cardboard and fold it so that it looks like a triangle on the side.(Like shown in the picture.) Step 3:  Cut out letters of what you want it to spell. I choose blogger because I am a blogger. :) Step 4: Now go ahead and stick on your letters to your cardboard with double sided tape.  Step 5:  Paint the whole thing. Let it dry completely before taki

Summer Photo Shoot part 2

Image
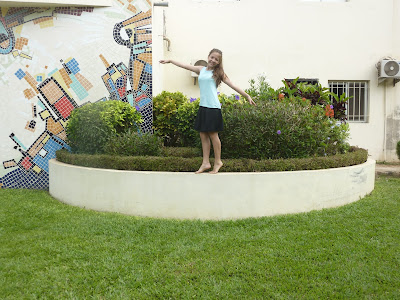
Hey guys! Today is my second photo shoot! :) So remember when I posted the last photo shoot I told you that another photo shoot would be coming out soon? Well here it is! I am really excited to show you guys this one! This is my summer outdoor Photo Shoot! So it is basically photo shoot part 2! :) But anyways here it is! I hope you like it! Also let me know in the comments which one is your favorite! -BloggerGirl This is a bonus post so there will be a craft up on Monday.

Fourth of July Bookmarks

Image
Hey guys! Today is Independence Day in America so I thought that I would share with you guys on how to make your own american flag bookmarks. Even if you are not from America you can still recreate these bookmarks with the flag of the country you are from! But I hope you enjoy this craft! Happy Independence Day and Happy late Canada Day ! So let's get started! Step 1: Gather your supplies: Tape, scissors, a pen, red,white and blue colored paper.(If you are doing a different flag chose it's colors) Step  2: Cut out some, white strips, some very thin red strips, blue boxes, and some little white stars.(I used white boxes because it will take a long time to cut out stars)  Step 3: Glue on your strips and boxes to your long strip of white. Step 4:  Add the stars on by gluing them.  Step 5:  Take some extra red strips and tape them on the back of the bookmark. Step 6: Let it dry completely. And your done!! I hope you enjoyed!  T

Q and A Answers

Hey everyone! Today I am going to be answering your questions! In the  DIY Jar Cup  post I asked you guys to ask me questions in the comments of that post! So today I will be answering them! Thank you so much for asking your questions! So let's get into it! 1. Question from BloggerA asks: Where do you get the idea's for your crafts? Do you just come up with them or do you look around for ideas?  My answer: Great question! Most of my idea's I make up my self and on occasion I will try to recreate different crafts. And I do look around for inspiration! :) 2. Question from Musicgirl14: Where did you get the idea to start a blog?  My Answer: Love your question! About 5 or 6 years ago, my oldest sister made a blog and I thought it was really cool. So now 5 or 6 years later here I am with DIY Crafts!  3. Question from RhodeIslandBlogger: How long have you been blogging? My answer: I was hoping someone was going to ask this! But I started my first blog Anim